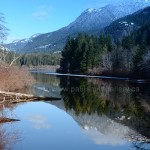
 I remember back when I was a younger lad with a full head of hair and an old Olympus OM1 35 mm format camera trying to figure out how to achieve better results with some of the compositions I was focusing on. I started experimenting with filters when shooting landscapes or oceanscapes and sunsets to see if I could get the look I was after. I went through a lot of film before I figured out that using colored filters gave me a much better look for my dull skies and boring colors in my trees and water. I also discovered a full colored filter isn’t always the right filter to get what I was after either. Sometimes depending on the light and background using a graduated color filter, a polarizing filter or graduated neutral density filter was more than enough to make my skies darker while leaving the rest of the composition as is. The picture on the left is one that I took mid day using a blue graduated filter to make the sky look like I wanted it to. Of course being there early in the morning or at twilight would have been the right thing to do, however that day I was just driving back from shopping and the reflections caught my eye. So I had to improvise to accomplish the look I wanted in the image.
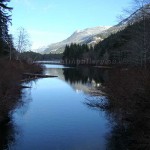
 Here is a similar shot zoomed out a little more using a circular polarizing filter to darken the elements of the image. This time I was trying to darken the water and trees which I accomplished by rotating the polarizing filter until I achieved the result I was after in my view finder. The bonus was that it also darkened the sky more than the normal light would allow. A polarizing filter works best when keeping the sun at 90 degrees to your side. Although when the sun is above and behind you the filter can be used effectively by shooting to the left or right of the direction you are facing. Polarizing filters are very good for making colors more vibrant by reducing or eliminating the reflections from the sunlight which washes them out. The glare from a window or body of water can be eliminated also by using a polarizing filter. Everyone should have a polarizing filter in their camera bag for situations that may occur where you need more saturation or to darken the washed out colors.
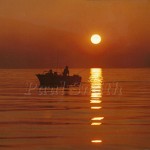
 In the image to the left, I was out fishing on a warm summers morning with another boat and the fog was lifting to a height that we could start seeing a fair distance. I decided to try using a full orange colored filter to see if I could capture the feeling I was having at the time. Needless to say I was very happy with the end result which is exactly how I felt that morning. The fishing that day wasn’t the best but the memory will stay with me forever in my mind and in an image that I can look at any time to remind me of that day on the water. It probably would have looked just as good with a full yellow colored filter also or even a red one. Both of which I didn’t own at that time.
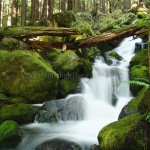
 This photo was taken while I was hiking the Crest Mountain Trail in Strathcona Park. For reference the first two images were taken from the bridge that crosses Drum Lakes and is the start of the trail. The beauty of this creek that drops off of Crest Mountain is that its banks are covered in a green moss while it winds its way through the old growth forest making for a vibrant looking photo. I decided that I wanted to slow the water down so I used a neutral density filter number 3 (ND3). A neutral density filter (ND) reduces the amount of light actually hitting the camera’s sensor thereby giving you more control over your exposure. In laymans terms this means that you can set your aperture to a smaller number for a greater depth of field and slow down the shutter speed to a slower setting. Most cameras today can’t give you the same silky smooth effect a smaller aperture and slow shutter speed will give you without using a ND filter.
Hope you enjoyed this post on using filters and I also hope it inspires you to go out and give them a go. You won’t be disappointed. Remember to keep bracketing your apertures and shutter speeds to see what effects you may achieve.
Talk to you later.
