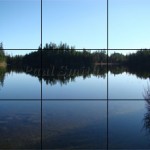
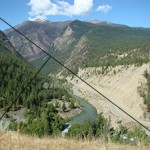
Composition in photography is one of the very first things an aspiring photographer should learn. It is not that hard to grasp and eventually becomes instinctual. I learned a long time ago to go with my gut feeling when seeing a potential image while driving or walking around with my camera. At first though my feelings were confusing. I wasn’t sure if the horizon should be centered or straight. Should the sky take up most of the frame or just a part of it. Where should I place the flowers or trees in the photo? Why do my images always look washed out?
 Lets start with a few rules that you should memorize for future reference. The first is the “rule of thirds”. Think of your image with a tic tac toe set of grid lines drawn over it. You want to try and compose your image with the main subject on one of the four lines or at the intersections of those lines. Of course there are always exceptions to the rule but generally if you follow this format your images will be consistently pleasing to the eye. If you click on the image to the left to expand it, you will see the focal point (the head of the sheep) sits at the intersection of the left grid lines. The eyes also line up with the top grid line. In landscape photography you want to keep the horizon level across the frame.
  In the image on the right the horizon is the line between the land and sky. You’ll also notice that the horizon is just above the center of the image. This is another rule related to the rule of thirds. In general the sky should only use up a third of the grid usually the top third, however when there are other focal points such as clouds or airplanes etc., you can expand that to your own preference.
Light is a very important part of any photographers toolset. Not only do you need to have the camera, filters, lens, tripods etc., you should also learn to view light as it falls upon your focal points. Light can make or break an image depending on where it falls or its intensity on the subject(s). Usually an image gets washed out (too bright) because of shooting in the open during the time of day when the sun is highest in the sky. If you have to shoot at this time of day try to use something to filter or block the light like a tree, mountain or building. The best light of the day is early morning or the last hour of sunshine. 
 Check out the following two photos to see what I mean. The first one was taken around 2pm and the second was shot about one hour before sunset. Notice the difference in the shadows of the foliage and the colour of the sky. Both of these shots were taken on the same day during the month of February. Sunset on that day was at 5:45 pm and the sun was setting behind a mountain which also lowered the light levels on the surrounding foliage. I was standing on a small bridge over a small stream separating two lakes. These shots are facing the east and you can see how much the light changes in just 2 3/4 hours. As the light diminishes the shadows become darker and colours more vivid.
Another rule is the “golden triangle” . The golden triangle is very simple to use and works well with diagonal lines. Remember to use three objects roughly the same size and place them inside three triangles with corresponding shapes. You can also use one object as long as it resides on or near the intersection of the perpendicular line. 
 A good example here would be portraiture where the subjects head or eye lines up with the intersection. In the bridge river photograph the road, river and mountain in the left side all fall inside a triangle. With the bald eagle photo the eagle is close to the saddle point, ideally the eagles head should be lined up with the intersection up and to the right. Experiment here with different situations and always try to think in terms of triangles when placing your subjects for the golden triangle rule.
Hopefully some of these simple rules will help you to take better quality photos or get you interested in more advanced rules using math equations if that is what intrigues you. I have found over the years that most of the time when I see a shot that looks appealing to me, my mind has already factored in the rules described above. Remember practice makes perfect so keep shooting and keep records in a small notebook of weather, light, aperature, shutter speed or anything else you may deem important to the area where you took the photo.
